
Some of the links in this post are affiliate links. This means if you click on the link and/or purchase the item, I will receive an affiliate commission at no extra cost to you. All opinions remain my own. If you choose to purchase from one of my links, it helps support this blog!
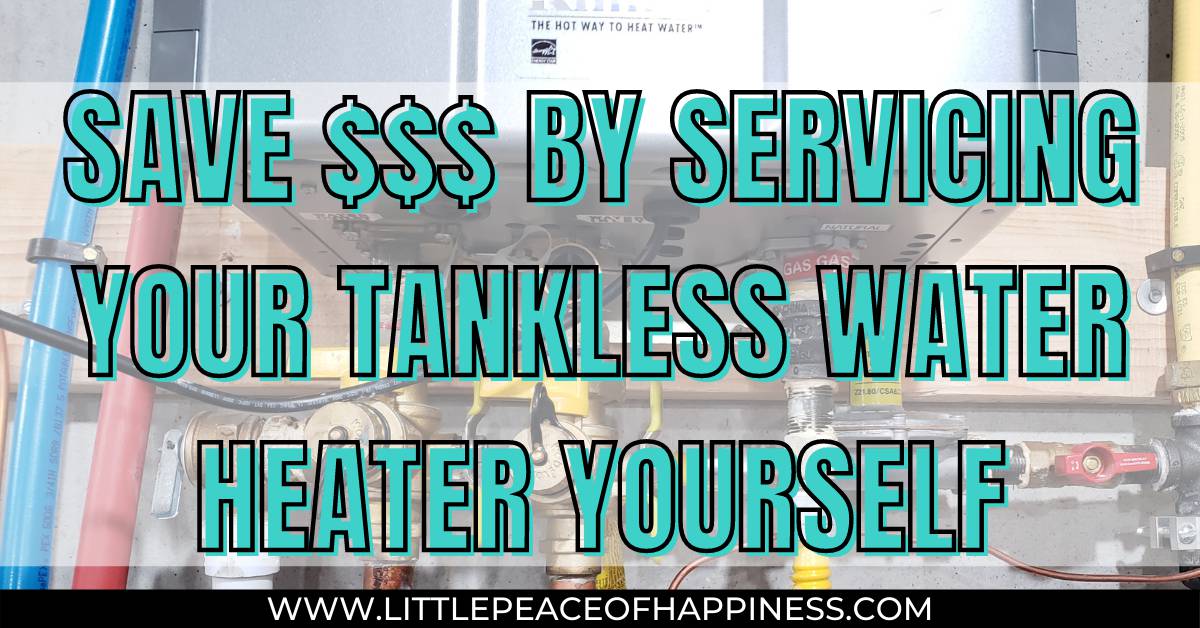
When we bought our first house, one of the perks we were looking forward to was having a tankless water heater. We heard good things about them like reduced energy usage, lower energy bills, and never having to worry about running out of hot water.
What we didn’t know is that in order for a tankless water heater to do all of those amazing things, we actually need to perform maintenance on it every year.
After making a couple of phone calls to plumbers and heating and cooling companies, they quoted anywhere from $100-300 depending on the level of cleaning. Now imagine paying that cost every single year!
As new house owners, we have a lot to learn in its maintenance so we did some research to see if we can save money and do it ourselves. Flushing out a tankless water heater is actually really easy to do.
You just need to invest ~$150 in the beginning for all the supplies and you’re set year after year!
In this post, I have written instructions, photos, a how-to video, and a few flush kits that you can buy to do it yourself to save a lot of money!!!
WHAT'S IN THIS POST?
Why does a tankless water heater need to be serviced?
Some of the major perks of a tankless water heater is the quick availability of hot water and the likelihood of running out is pretty low. Having a tankless water heater gives you instant water when you need it instead of heating and storing a large capacity of heated water like a traditional water heater.
Every time your turn on the faucet to hot, cold water is pushed through the tankless water heater and heat exchanger is heating up the water. Depending on the hardness of the water in your region, the heating will lead to scale build up in the tankless water heater.
The scale build up makes the water heater less efficient meaning more energy will be used to heat up your water. The harder your water heater has to work will lead to its early demise if it’s not maintenanced properly.
Your tankless water heater should be flushed and descaled at least once a year and potentially more depending on the hardness of your water. This can be done with a vinegar flush or a descaling solution.
You may also like…
- 21 Ways to Update your Home on a Budget
- How to Get Started with a Home Renovation
- 10 Things you Must do BEFORE Buying a Home
- 9 Best Tips for First-Time Homebuyers

Before starting maintenance on your tankless water heater
The flushing will take at least an hour to do, which means you’ll be without hot water during the time. So use any hot water that you’ll need that you can’t wait for before starting.
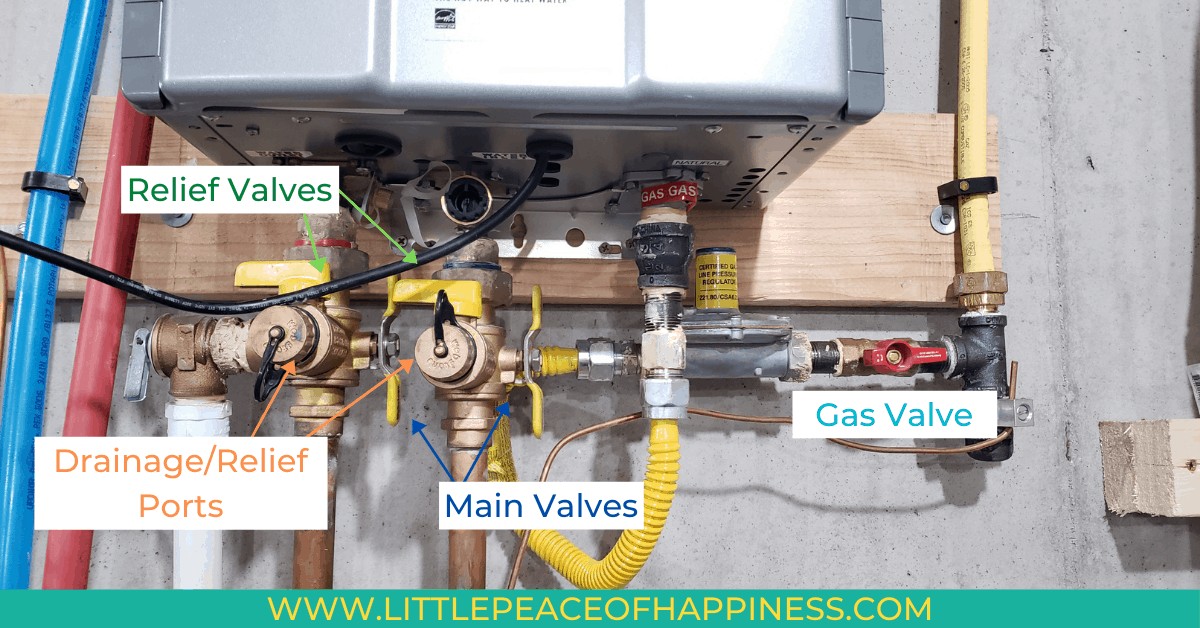
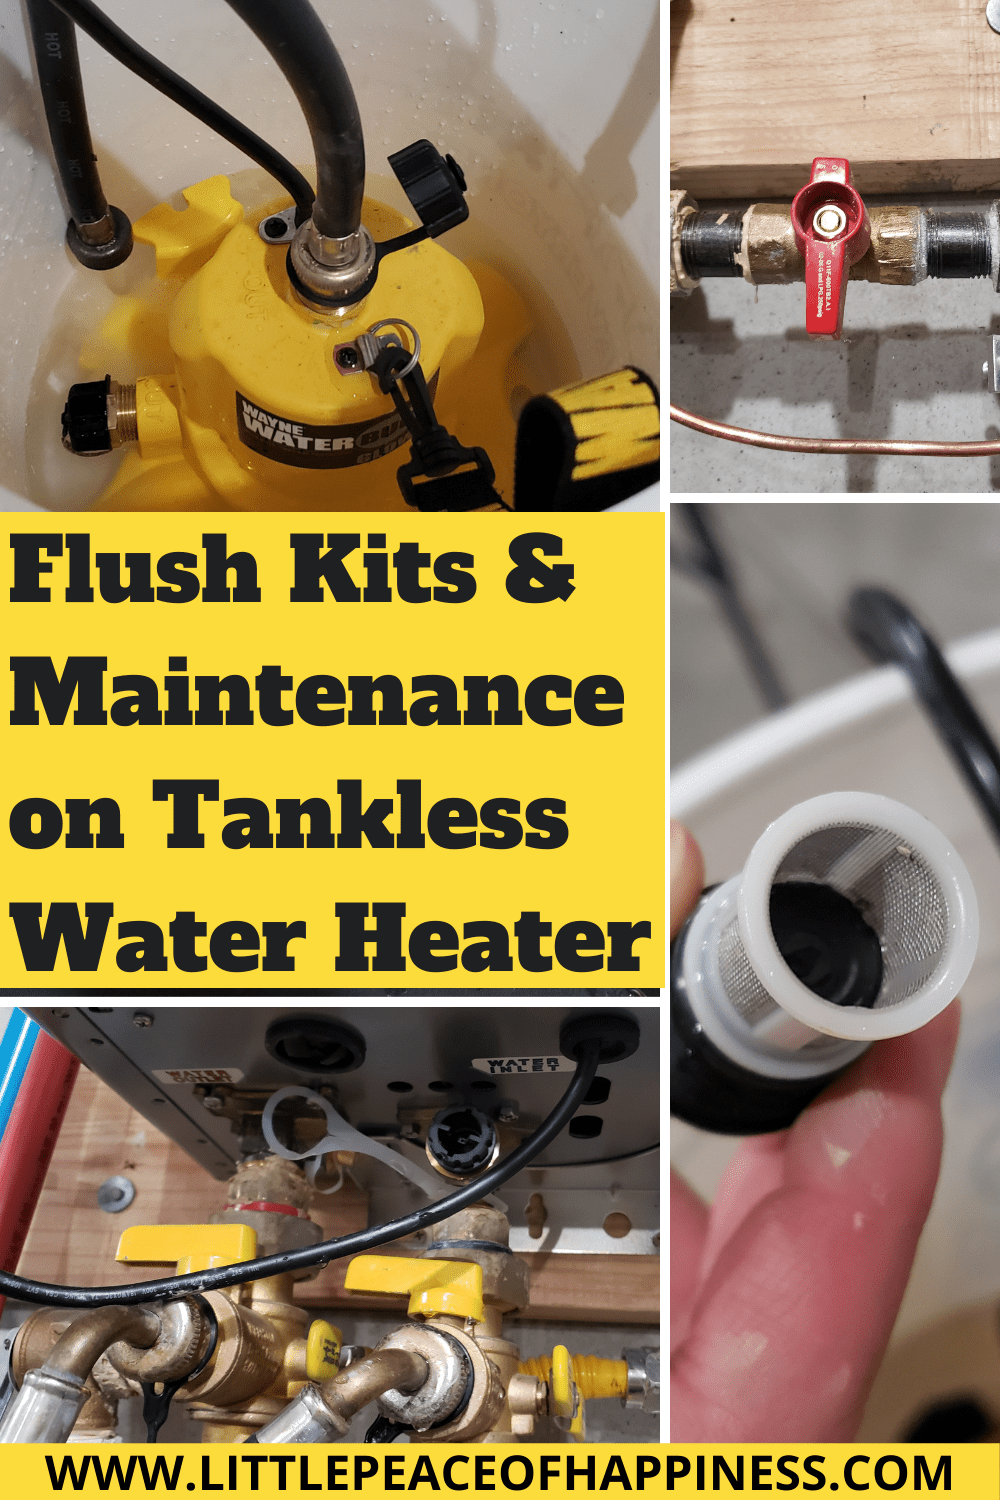
Check the tankless water heater for the correct isolation valves. There will be two lines (1) water inlet for cold water going into the water heater and (2) water outlet for hot water coming out of the water heater.
On each line, there are main hot and cold valves that will allow you to shut off water going into and out of the unit and separate drain/relief values that you can open to service each line.
If you do not see the correct valves, you’ll have to contact a plumber to have those properly installed because you cannot do maintenance without them.
In addition, check your manufacturer’s warranty and instruction manual. The manufacturer may have their own method of how to service your unit and doing it on your own may void any warranty.
What materials do I need to perform maintenance on my water heater?
Servicing your own tankless water heater is super easy and it only needs four main supplies to get the job done! You can buy all of the parts separately or buy a flush kit that has all of the tools that you will need.
For this project, you will need:
For Tankless Water Heater Flush Kits, check out the section below.
FREE MAINTENANCE TRACKER
sign up to get access to our freebie library where you’ll find more useful goodies for digital planning and printing!
Home Maintenance Tracker and Schedule to keep track of your home maintenance to-dos! Available as a PDF printable or digital inserts in light or dark modes for digital planning.
How to maintain and descale your tankless water heater
The following instructions will be for a tankless water heater that operates on natural gas. The images and video are for a Rinnai Tankless Water Heater. These steps can be used for any other tankless water heater.
Performing the vinegar/descaling flush
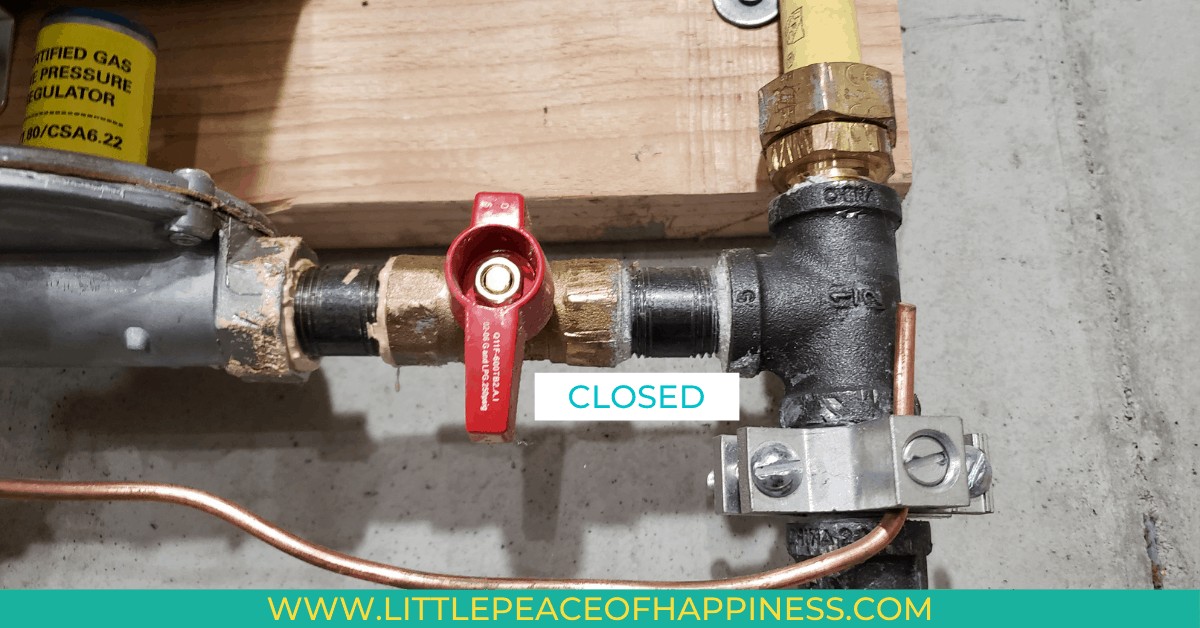
- Before hooking up the supplies, close off the gas valve and turn off the tankless water heater.
- Close off the main values to the cold water inlet and hot water outlet by turning the handles perpendicular to the piping.
- Open the drainage port (not the valve) on the hot piping to connect the first washing machine hose and place the end of the hose into the 5-gallon bucket.
- Set up the submersible pump by attaching the second washing machine hose onto it and place it into the same 5-gallon bucket as the first hose.
- Open the second drainage port (not the valve) on the cold piping to connect the opposite end of the second washing machine hose. This will connect the tankless water heater to the submersible pump.
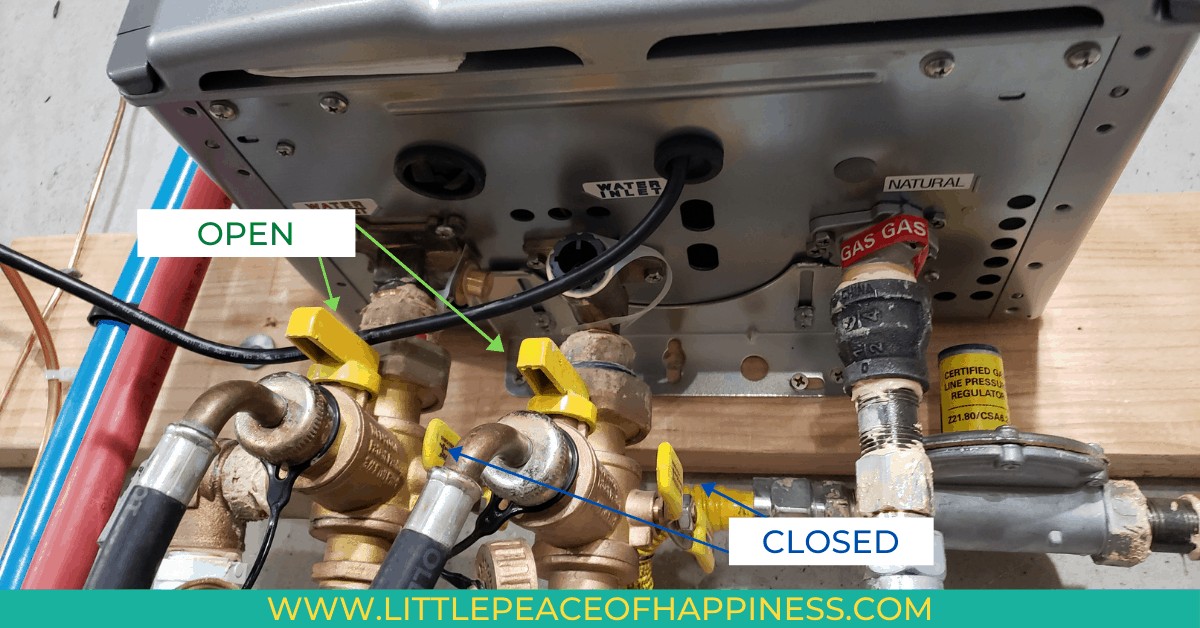
- Open the drainage/relief valves for both the hot and cold piping that are above the drainage ports to remove any remaining water that is still inside the tankless water heater.
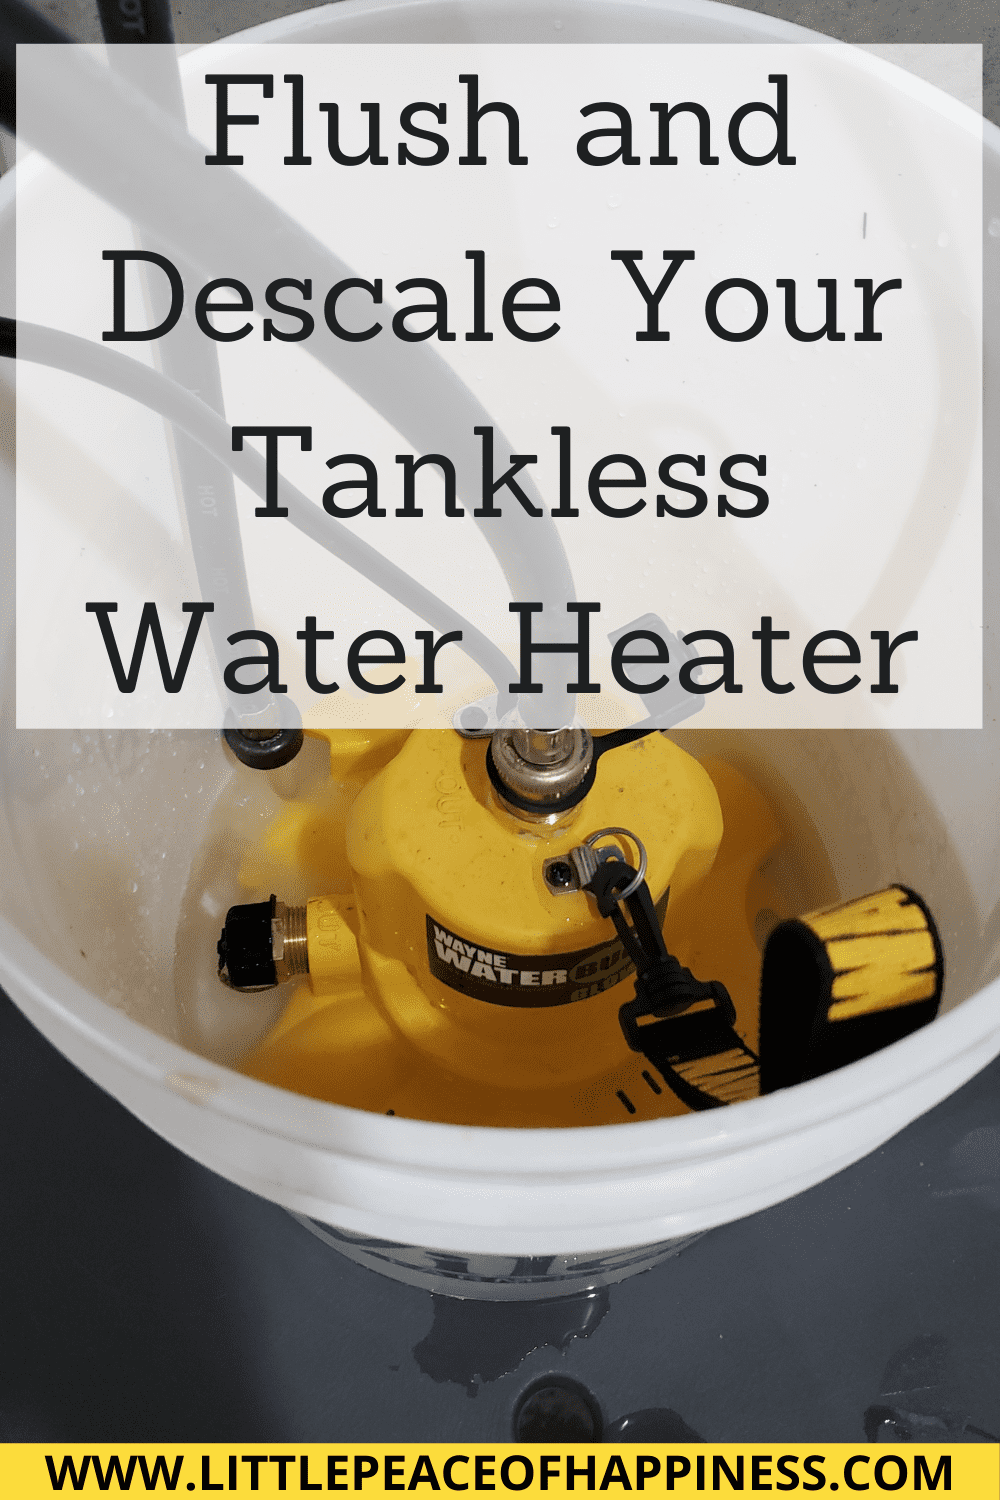
- Pour the undiluted vinegar or descaler solution into the bucket. If you’re using vinegar, use at least 2 gallons of vinegar. For the descaler, follow the instructions provided by the manufacturer. Keep in mind the type of submersible pump and how much solution it can handle.
- Turn on the submersible pump and flush the tankless water heater for at least 1 hour.
Flushing out the vinegar/descaling solution
- After at least an hour of flushing, turn off the submersible pump and close off the drainage/relief valve on the cold piping.
- Open the main valve on the cold piping slowly, to introduce new water into the tankless water heater and flush out the cleaning solution that is still inside the water heater. The water will go through the water inlet and will come out of the drainage line on the hot side and drain into the 5-gallon bucket.
- Flush for a few seconds to 1-2 minutes. This depends on how much water you can fit in your bucket. Then close the main valve on the cold piping again.
- Remove everything from the bucket and empty out the water.

Cleaning the flush kit for future use (optional)
This process is optional; however, it was done when we flushed our tankless water heater. We flushed clean water through both washing machine hoses and the submersible pump using the same process as flushing the tankless water heater, but using clean water instead of the vinegar/descaling solution.
- With an empty bucket, follow step 10 in flushing out the vinegar/descaling solution, by filling the bucket with fresh water directly from the tankless water heater.
- When there is 1-2 gallons of water in the bucket, close the main valve on the cold piping and reopen the drainage/relief valve on the cold piping.
- Turn on the submersible pump to allow the fresh water to go through the system for a couple minutes to clean the hoses and pump.
- Turn off the submersible pump, and close all of the drainage/relief valves. At this point all valves should be closed (perpendicular to piping)
Final steps of maintaining the tankless water heater
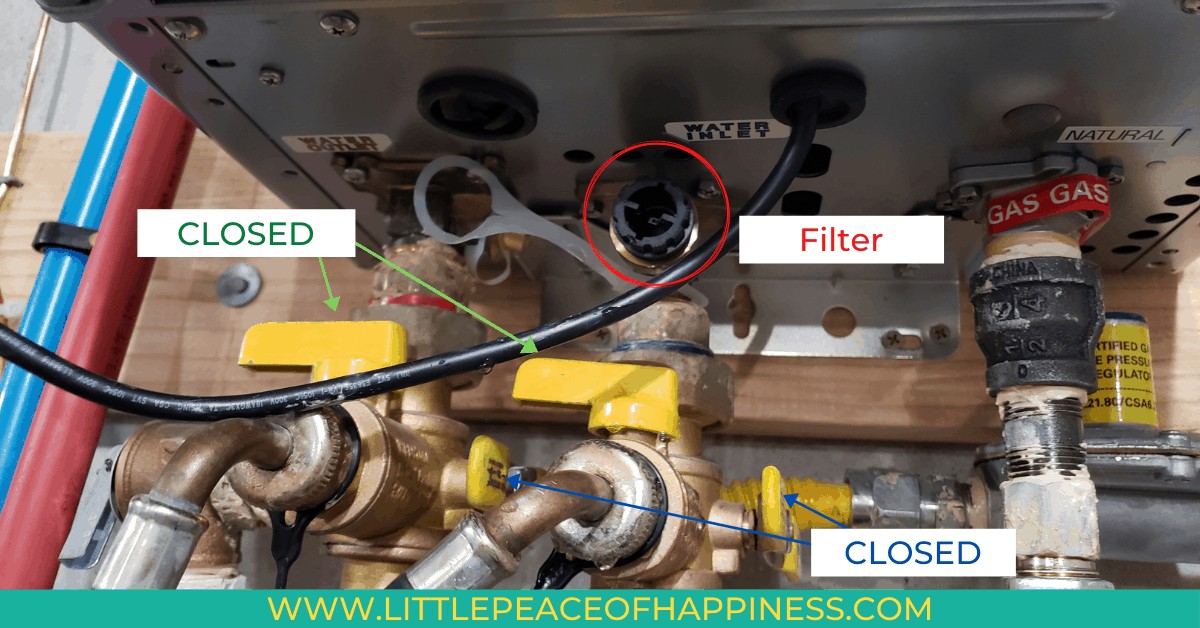
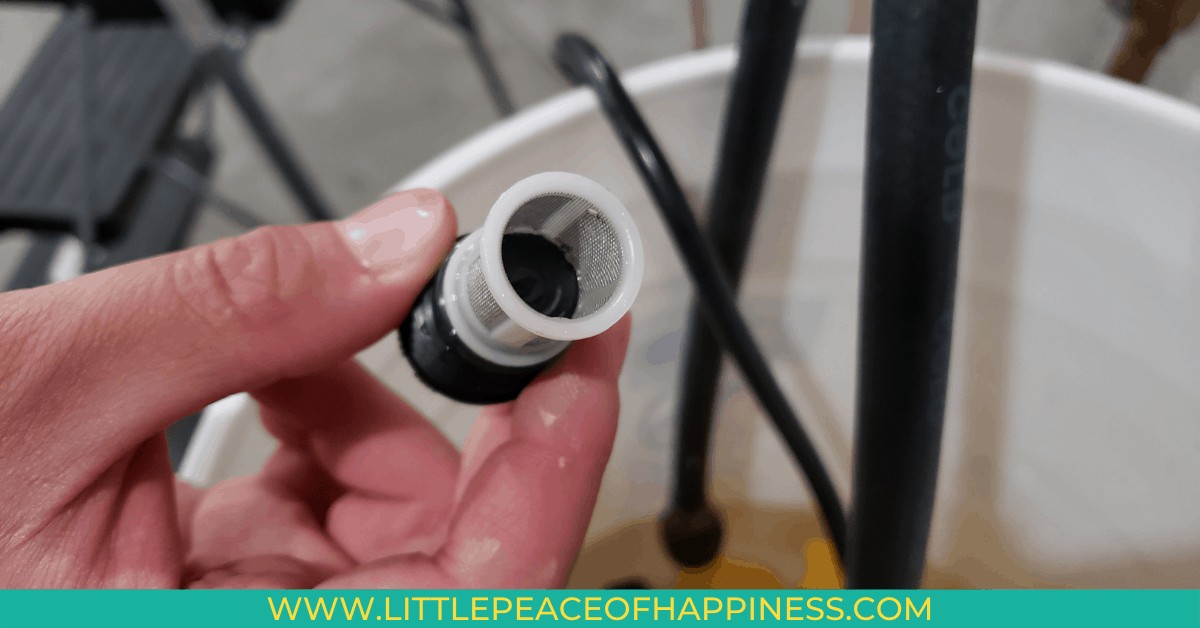
- With all valves closed, remove the filter that is above the water inlet line. Clean the filter out of any debris and/or sediment that has been caught by the filter. Return the filter back when it is cleaned.
- Disconnect the washing machine hoses and replace the cap to the drainage ports.
- Open the main valves to the hot piping and then slowly the cold piping. Turn on the tankless water heater, and open the gas valve.
- Double check that all valves are in their proper position and that there are no leaks. Go to any sink and turn on the hot water. There may be air in the piping so give it a few seconds to flush out. If you don’t feel hot water, make sure your tankless water heater is on and that your natural gas is also open. Give yourself a pat on the back for doing your own maintenance on your tankless water heater! Don’t forget to make a note of when the maintenance was done to keep track of when you have to do it again next year!
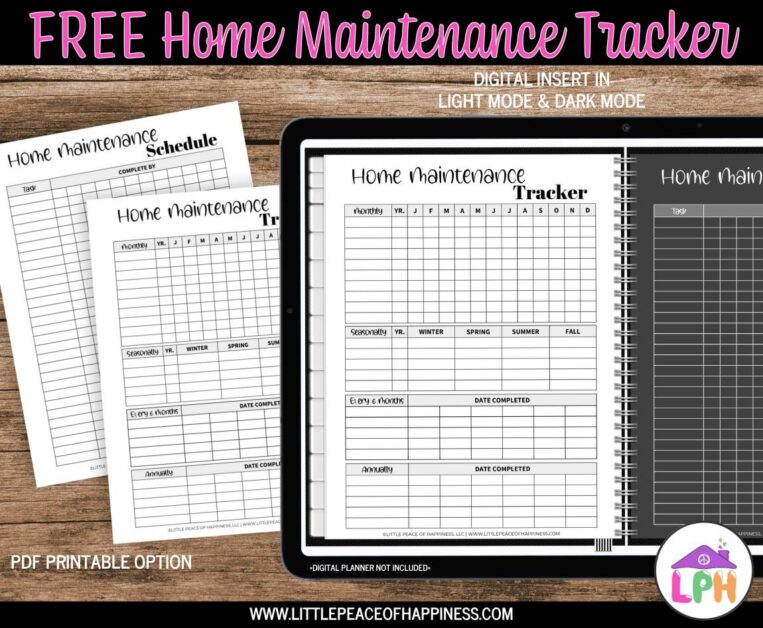
I created a home maintenance tracker that you can print off and keep track of all the maintenance that you do in your home. With the home maintenance tracker you can record dates on a monthly, seasonally, every 6 months, and annually basis.
The form you have selected does not exist.
Check out the how-to video that you can follow along to flush out your tankless water heater!
5 Tankless Water Heater Flush Kits
If you don’t want to go out of your way to buy all of the parts, check out these flush kits that will save you some time!
Some of the links in this post are affiliate links. This means if you click on the link and/or purchase the item, I will receive an affiliate commission at no extra cost to you. All opinions remain my own. If you choose to purchase from one of my links, it helps support this blog!
#1 My PlumbingStuff Tankless Water Heater Flushing Kit

The My Plumbing Stuff Kit includes two stainless-steel hoses, 32-ounce bottle of Flow-Aide Descaler which is nonhazardous, non corrosive, nontoxic, and biodegradable, a 5-gallon bucket, and a Zoeller 42-007 pump that you can use to maintain your tankless water heater.
#2 Kelaro Tankless Water Heater Flushing Kit (Add Vinegar)

This Kelaro Flushing Kit is great for anyone who is looking for a natural cleaning solution like vinegar and doesn’t care for a pre-mixed descaler solution. It has all the parts you need to descale, except for the vinegar. This kit needs 2 gallons of white vinegar.
It includes a 3.5 gallon bucket, a Kelaro ⅛ HP Utility Pump, and two 6 ft color coded rubber hoses for hot and cold. If you want this kit but with the rectorseal calci-free descaler, check out this one here.
#3 Superior Pump Tankless Water Heater Descaler Pump Kit

This Superior Descaler Kit comes with a ⅙ Hp pump, a 3.5 gallon bucket, two stainless steel hoses, and a 70z descaler powder that you’ll have to dissolve in a water solution. The ⅙ utility pump can move up to 1920 gallons per hour and will pump up to 20 feet in vertical height.
#4 Hercules Haymaker Tankless Water Heater Descaler Kit

The Haymaker Tankless Water Heater Kit includes the Haymaker descaler solution, two rubber 5 ft hoses, a 550 GPH electric recirculation pump and a 3.5 gallon bucket. The Haymaker solution is citric acid based, solvent free, and VOC-free and advertises to be 3x more effective than vinegar without the bad odor. It is also non-corrosive and septic-safe.
#5 Drainx Tankless Water Heater Descaler w/Biodegradable Descaler

This DrainX Flush Kit includes two 6 ft steel hoses, a 3.5-gallon bucket, a ⅙ HP pump, and their DrainX Biodegradable Descaler powder. Their powder is biodegradable and can remove organic, inorganic, and corrosion. This kit advertises to clean most water heaters in 30 minutes or less!
You may also like…
- 21 Ways to Update your Home on a Budget
- How to Get Started with a Home Renovation
- 10 Things you Must do BEFORE Buying a Home
- 9 Best Tips for First-Time Homebuyers
Conclusion
By the end of this post, you’ve learned how to descale your own tankless water heater which will save you hundreds of dollars every single year! It is so easy to do and takes less than 10 minutes to set up and clean up.
This doesn’t include the one hour wait time while you let the submersible pump do it’s thing. You can just set it and forget it! All you need are four things (2) Washing Machine Hoses, Submersible Pump, 5-Gallon Bucket, and Vinegar or Descaler Solution.
Not only do you know how to maintain a tankless water heater, but you’ll have all the parts you need to do it year after year. Instead of paying a professional tradesperson up to $300 every year, buy yourself a tankless water heater flushing kit for under $160!
- My PlumbingStuff Tankless Water Heater Flushing Kit
- Kelaro Tankless Water Heater Flushing Kit (Add Vinegar)
- Superior Pump Tankless Water Heater Descaler Pump Kit
- Hercules Haymaker Tankless Water Heater Descaler Kit
- Drainx Tankless Water Heater Descaler w/Biodegradable Descaler
Wishing you a Little Peace of Happiness on your next home DIY!

Pin Me for Later!
The form you have selected does not exist.