

Painting cabinets is all the rage and for good reason. Paint is an easy way to renovate a space without spending a lot of money. It can transform any space and if done right, no one will know that you did it yourself!
One of our big concerns was that the paint job would look cheap with runny paint and brush marks. We also did not want to lose the natural wood grain underneath. We wanted a nice professional finish that was affordable.
After we decided on painting cabinets, we received SO MANY compliments when we were done!
I’m here to tell you that you can do it too and I’m so excited to share the top 7 secrets that we discovered that you NEED TO KNOW to paint your cabinets like a pro!
Some of the links in this post are affiliate links. This means if you click on the link and purchase the item, I will receive an affiliate commission at no extra cost to you. All opinions remain my own.
The 7 Secrets to Painting Cabinets WITHOUT Looking Cheap, Drippy, and Ugly!

Secret #1
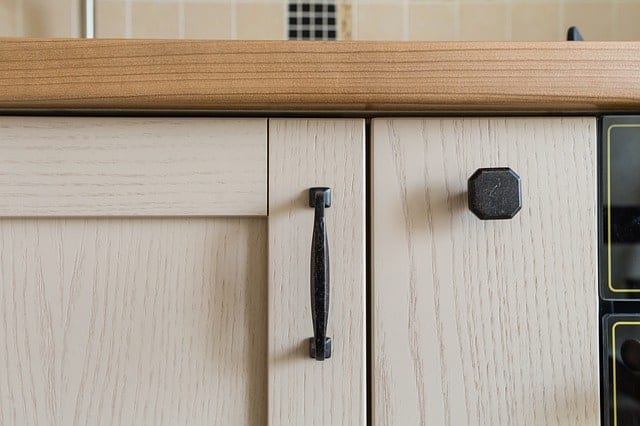
Organize the hardware
To remove the hardware or not to remove the hardware? Yes, it will save you time to leave the hardware on. But in reality, it won’t give you a nice professional finish at the end. If the hardware is left on and painted over, in time the paint will start to rub off.
I know this is a tedious process, but one that will pay off in the end. Your friends and family will be asking you how much it cost to pay someone to paint your cabinets. Then you’ll tell them that you did the work yourself and they will be AMAZED!
So now that we’ve decided that we’re removing the hardware, you need to keep them organized. The top and bottom hinges are adjustable and were already adjusted specifically for the cabinet front. Organize the hinges by placing them inside your cabinet and have a way to identify the top and bottom hinge. This will make the process easier when you have to put the hinges back on.
For the cabinet and drawer knobs and handles, you can place all together in two separate containers. Keep the screws together by screwing them into the back of their counterparts (knob or handle).
So, what do you think you’ll do? Keep them on or take them off? Let me know in the comments what you decide and how did it turn out?
Secret #2
Paint without sanding
Sanding is one of those things you hear that HAS to be done before painting. I’m here to tell you it’s NOT! You do not need to sand before you start painting your cabinets. If you don’t have a power sander or the patience to sand by hand, you don’t have to.
I have painted other projects that required sanding as the prep work and thankfully this was not one of them. Can you imagine sanding all of your cabinet boxes, doors, and drawer fronts? That would be a nightmare and would take you forever!
Here’s a reality check, you still need to clean your cabinets and I mean clean them really well. Think about all of the cooking that was done in the kitchen and the grease and dirt built up over the years. If you don’t provide a clean surface to paint on, the paint will just come right off. So make sure the surfaces are clean and dry.
You can use a TSP (Tri-Sodium Phosphate) cleaner to remove the really dirty areas. We just moved into our home so the kitchen was pretty clean. I just used a sponge brush and a mixture of warm water, vinegar, and dish soap. I created a baking soda paste for high grease areas.
It’s prime time! A good quality heavy-duty stain blocking primer is the replacement for sanding. It’s essential to make sure it is a stain blocking primer and not a regular primer because it will have a mildew-resistant finish. This is important for painting cabinets in the kitchen and bathroom. You don’t want the moisture from cooking and showering to seep through the paint. The paint will start to peel without it.
Don’t skip the prep and prime! You don’t want all your hard work to go to waste do you?

Secret #3
Use a GOOD paintbrush
When we’re at the home improvement store looking at all of our brush options, it’s easy to grab the cheapest brush. But don’t! A poor quality brush will show in the brush marks in the end and will not give you a smooth finish. I am sharing my own experience here. Please learn from it!
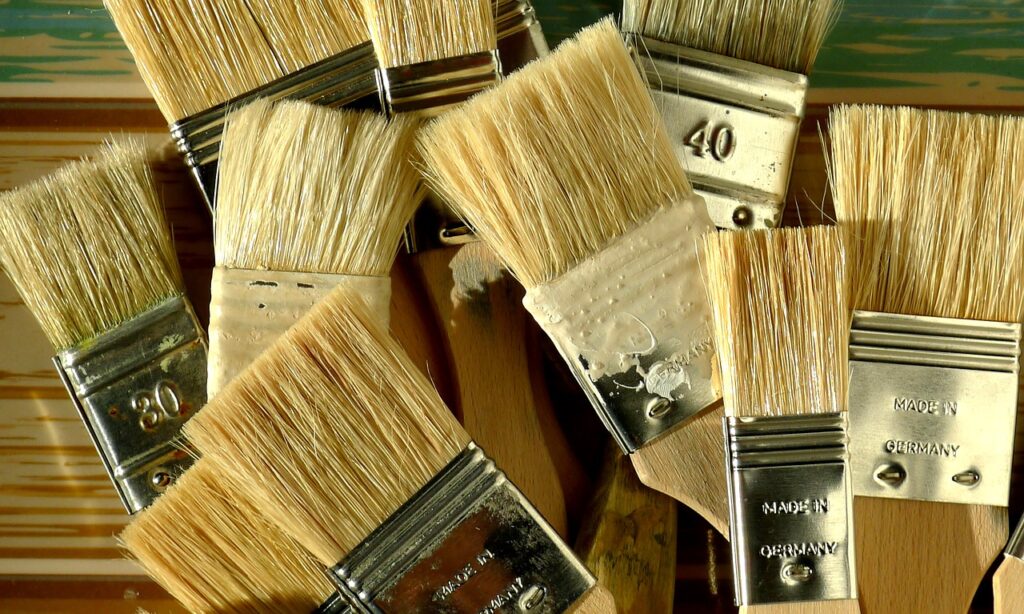
I initially bought the middle-tier brush which was okay but when I took the plunge and bought the nice one, it made a HUGE difference! A good quality, synthetic, medium dense brush made painting so much easier.
In this case, the size matters here. You don’t want a brush that’s too small because it will take longer to paint. You also don’t want one too big or it will be hard to cut into the edges and corners. I found the perfect brush to be 2-2.5 inches wide and an angled brush.
My personal favorite for painting after two years is the Purdy 2 inch angular paint brush. This is my all time favorite brush that I use to paint my furniture as well. If a good knife cuts through butter, this one paints like butter. Does that even make sense?!?! The paint application is velvety smooth and it holds more paint than the cheaper brushes. More paint on the brush means more paint on the cabinet.
If anything comes out of the secrets, this one is the biggest! Save yourself money and time and just buy the better quality paintbrush.
Secret #4
Roll, baby, roll
Painting cabinets and drawer fronts will get old, real fast. Thankfully they are flat, for the most part so using a paint roller will save you time and be easy on the hands. Remember when I said size matters on the paintbrush? It matters here too.
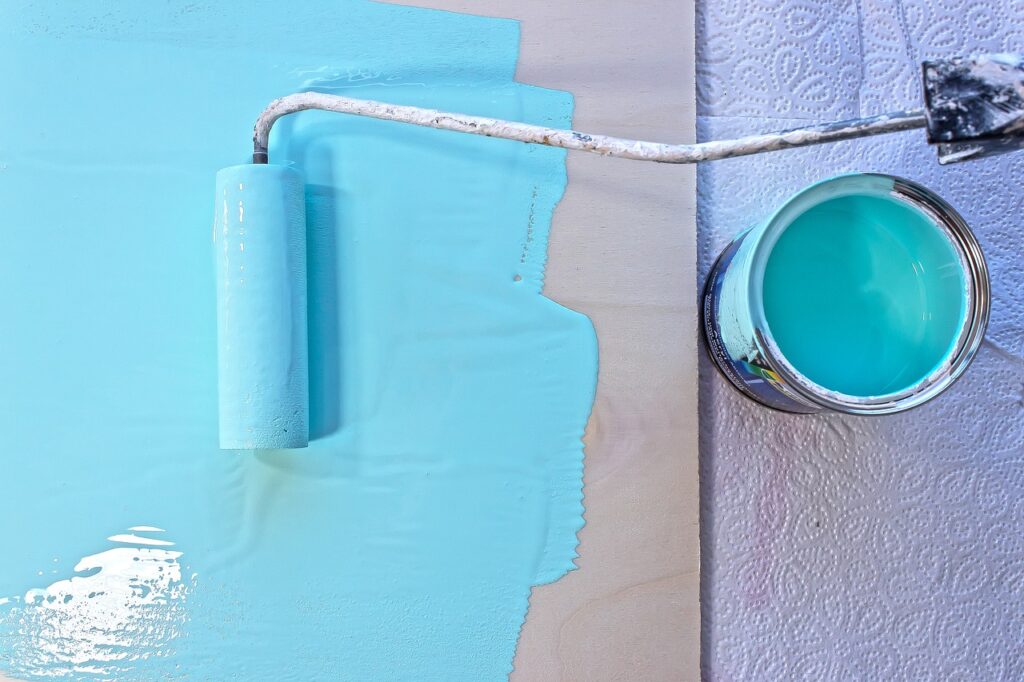
I found that a 6 inch roller did the trick really well. I wouldn’t go any larger than a 6 inch roller. More specifically, you need a high density foam roller that is made for cabinets and doors. This will provide you with a smooth finish and makes the paint application a lot quicker.
I used the Whizz Cabinet and Door 6-inch mini Foam Paint Roller.
Obviously at this point you’ll need the paint roller frame to hold the foam roller. You can find a cheap paint roller frame at Dollar Tree. I tried the roller there and I was annoyed pretty quickly. The foam roller kept sliding off of the frame and I constantly had to push it back on. If you can find a roller frame that fits your foam rollers well, that is a plus.
In addition, the handle on the roller frame at Dollar Tree felt very flimsy so if it is in the budget, use a better quality paint roller frame.

Secret #5
Use a table to paint
Imagine being crouched down on the floor painting cabinets for 1-2 hours and your ankles starting to swell and your back wanting to give out. That was me. We only had one foldable picnic table and so many cabinet doors that I had to work on the floor.

We were in the process of moving into our home and I was being overzealous in painting our cabinets at the SAME TIME. I was a 30-something year old who felt like a 50-something year old by the end of it.
If you have the space, try to minimize the amount of time you’re spending on the floor painting your cabinets. Use a table to paint cabinets and drawer fronts and then carefully move them to the floor. When it’s time for the next coat, bring them back on the table to paint and repeat the process.
I wouldn’t say this is a “how to paint without looking cheap” secret. I’m doing you a favor by letting you know that long periods of time painting in a bad position will wreck you for a few days. This can easily be prevented if you use a table or something to elevate your painting surface. Just trust me on this. I went through the pain and sharing this with you so you don’t have to.
You’re welcome 🙂
Secret #6
Don’t use Painter’s Tripods
If you’ve watched a few tutorials or spoken to our local hardware salesperson you may have learned to use Painter’s Tripods or Pyramids when painting cabinets to prop your cabinet fronts and drawers.
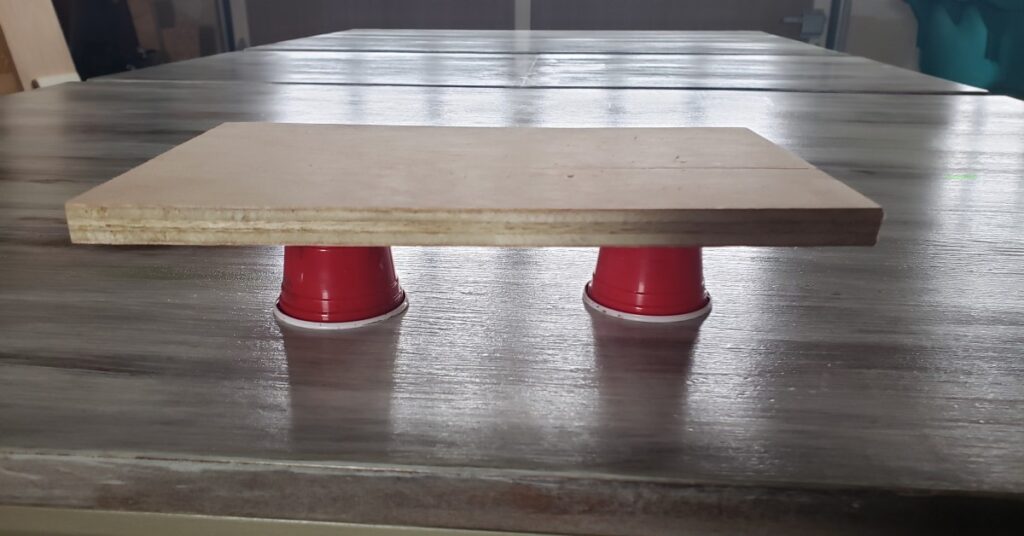
I wanted to do this as cheaply as possible and to pay ~$7 for only a 10 pack, I couldn’t do it. For each cabinet and drawer front you need at least 4 to support it from underneath. I’ll let you do the math.
I had to be creative in how I wanted to do this. I also wanted to do something that was more sustainable. You know those cardboard and Styrofoam egg cartons? I initially cut them all out and used them as props. They worked well at the time except for when they couldn’t support the weight of the larger doors. I also found that if the paint was not dry all the way before I flipped it over, little bits of cardboard stuck to the surface. It wasn’t noticeable after I wiped it off, but I needed another solution.
This next solution is not as sustainable, but it is reusable and can be recycled in the future if needed. I actually still use these today when I need to prop anything I’m painting.
The secret is 2oz MINI SOLO CUPS! This is an affordable and sturdy option as an alternative to the Painter’s Tripods. You can find a pack of 200 on amazon for $10. That to me is a great deal and we actually already had some around the house. I would consider this a life hack that will save you money and one that you can reuse again and again.
Check out the 2oz plastic shot cups, here.

Secret #7
Use a GOOD quality paint
If you want a nice finish to on your painted cabinets, then you need to use good quality paint. The fact is, yes the paint is a little more expensive than your traditional wall paint. However, if you’re putting in all the work in prep and prime, then you need to finish the job with good paint.
A standard interior latex paint used on walls does not have a strong enough finish to for painting cabinets because it will not withstand the everyday wear and tear. A high quality paint will last longer, be easier to clean, and will provide a nice smooth finish without all of the paint marks.
When choosing which paint for your cabinets you need to find one that is self-leveling and provide a smooth and hard surface when dried.
For our cabinets, we used interior Valspar Cabinet Enamel in a semi-gloss. It is a hybrid, water based and oil-enriched paint. Because it is water based it makes it very easy to clean up with warm soap and water. We liked it because it was tintable to over 1000 colors and we chose to paint our cabinets in Peppercorn (HGSW1491).
For more cabinet paint ideas check out The Spruce article 7 Best Cabinet Paint Brands, here.
Conclusion
Painting cabinets is an affordable way to renovate your home on a budget. Anyone can paint cabinets as long as the work is put in during the prep and prime and with a high quality paint to withstand the grease and grime. The first time I painted cabinets, I was overwhelmed but the end result was worth it. I was so happy with the results at the end and it made our kitchen feel more updated.
These are the secrets that I wish I knew when I first started painting cabinets. I know you guys can do it too and I can’t wait to read about your painted cabinets!

Read More:
- How to Get Started with a Home Renovation
- 21 Ways to Update Your Home on a Budget
- 10 Things You Must do BEFORE Buying a Home
- 9 Best Need-to-Know Tips for the First-Time Homebuyer
Let me know in the comments below, which secrets were helpful to you? If you finished your cabinets, tell me how it went!
Wishing you a Little Peace of Happiness in your cabinet makeover!

The form you have selected does not exist.